

Dark
Light

The Future of Online Betting in Africa
The future of online betting (for instance - CS:GO Betting) is poised to be an exciting and transformative one, with advancements in technology, changing regulations, and shifting consumer preferences shaping the landscape. In this article, we will explore some key trends and developments that are likely to influence the future of online betting.
PHP Applications: Pt 1 – Mantis
I’ll be doing a series of articles on PHP applications over the next few weeks and months. As…

Event Feedback: IDM Management Shootout
For your convenience, the two presentations used were Microsoft Identity and Access Solutions and IAM_Overview – Cape Town…
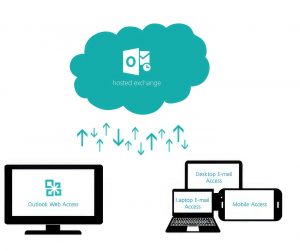
The Future of hosted Exchange
If you host Exchange or you’re thinking of hosting Exchange, then you live in interesting times. Microsoft’s Worldwide…

SQLCape User Group
In everyday life of work, traffic, speeding fines and deadlines, one often forgets to look at the bigger…

Going to Cloud Based Exchange and don’t know where to start? Want to Compare Gmail and Exchange online side by side?
Very common for most orgs to not know where to start, or understand where the benefits are. This…

ITPROAFRICA July Security Event
Threat Predictions 2012 This presentation will take look closer at the emerging IT security threats we are faced…

Build your own cloud
Why build your own? Do you need your own? What if you do? And you want to build…
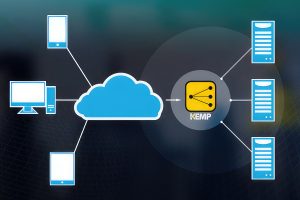
Free LoadMaster by Kemp Technologies
Kemp Technologies offers a fully featured and best in class load balancing solution which supports both Layer 4…

Office Communications Server 2007 R2 Virtualization
In a post on Microsoft’s Office Communications Server blog, Jerome Berniere, senior program manager in the Office Communications…